
Can you build a basketball court in your backyard? Yes, you absolutely can! With careful planning and smart choices, creating your own backyard basketball court is an achievable dream.
Building a basketball court in your backyard is a fantastic way to add value to your home and provide endless hours of fun for family and friends. Whether you’re aiming for a regulation-size court or a smaller half-court for casual shooting, the process involves several key steps. This guide will walk you through how to build a basketball court in your backyard on a budget, covering everything from planning and materials to installation and maintenance. We’ll explore cost-saving strategies to make your dream a reality without breaking the bank.
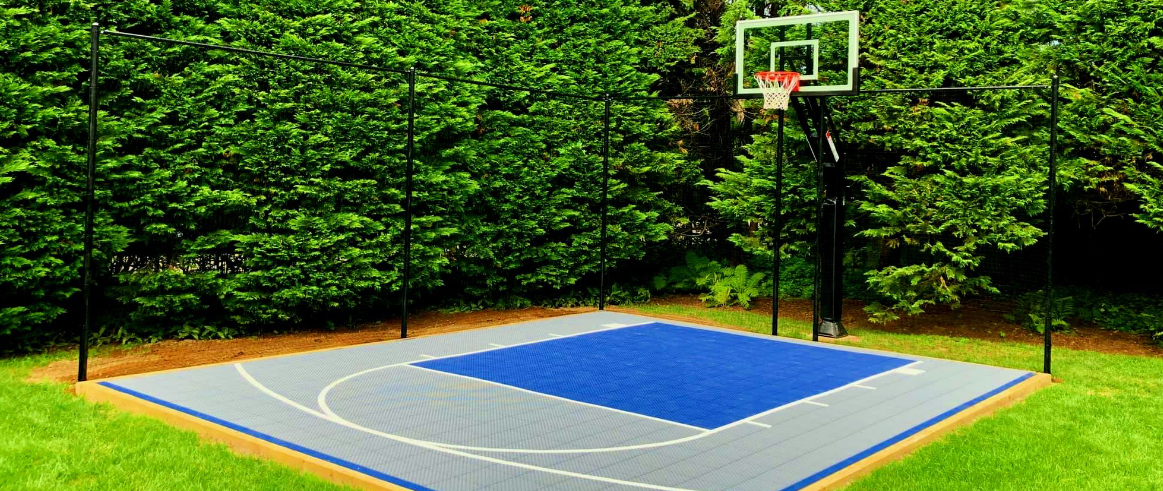
Image Source: cdn.versacourt.com
Planning Your Backyard Basketball Court
Before you even think about digging, thorough planning is crucial for a successful and budget-friendly backyard basketball court construction.
Determining Home Basketball Court Dimensions
The size of your court will depend on your available space and intended use. For a full court, you’ll need a significant area, typically 94 feet long by 50 feet wide for NBA regulation. However, most residential courts are much smaller.
- Half-Court: A common size for residential courts is a half-court, which is approximately 47 feet long by 50 feet wide. This allows for shooting practice and one-on-one games.
- Custom Sizes: You can also opt for custom dimensions that fit your yard. Even a smaller 30×30 foot area can provide a fun shooting space.
Consider the following when deciding on your home basketball court dimensions:
- Available Space: Measure your yard accurately. Account for any existing structures, trees, or landscaping you want to keep.
- Playing Style: Will this be for serious practice, casual shooting, or full-court games?
- Safety: Ensure there’s ample run-off space around the court to prevent accidents.
Budgeting for Your Project
Creating a budget is the cornerstone of any cost-effective DIY project. Break down all potential expenses to get a clear picture.
Key Cost Categories:
- Site Preparation: Excavation, grading, and base material.
- Surface Material: Concrete, asphalt, or modular tiles.
- Hoop System: Portable hoop, in-ground hoop, or backboard and rim.
- Lighting: If you plan to play at night.
- Fencing/Landscaping: Optional but can enhance safety and aesthetics.
- Permits: Check with your local municipality.
Securing Necessary Permits
Many areas require permits for backyard construction projects. Always check with your local building department or city hall. Failing to get permits can lead to fines or the need to dismantle your court. This step might add a small cost, but it’s essential for legal compliance.
Choosing Your Outdoor Basketball Court Materials
The material you choose for your court’s surface will significantly impact cost, durability, and playability.
Concrete Basketball Court Benefits and Costs
Concrete is a popular choice for backyard basketball courts due to its durability and relatively smooth playing surface.
- Pros:
- Durability: Concrete is extremely hard-wearing and can last for decades with proper care.
- Low Maintenance: It’s resistant to weather and pests.
- Smooth Surface: Provides a consistent bounce for the ball.
- Cons:
- Cost: Can be more expensive upfront than other options.
- Installation: Requires professional installation or significant DIY effort for proper pouring and finishing.
- Hardness: Can be tougher on players’ joints than softer surfaces.
Asphalt Basketball Court Cost vs. Concrete
Asphalt is another viable option, often considered slightly less expensive than concrete for installation.
- Pros:
- Cost-Effective: Generally has a lower initial installation cost compared to concrete.
- Flexibility: More forgiving on joints than concrete.
- Quick Installation: Can be laid and ready for use relatively quickly.
- Cons:
- Durability: May require more maintenance and resealing over time compared to concrete.
- Surface Wear: Can crack or develop potholes if not properly maintained.
- Color: Typically black, which can absorb more heat.
The asphalt basketball court cost can vary significantly based on your location, the thickness of the asphalt, and the contractor. Expect to pay anywhere from $3 to $7 per square foot for installation. Concrete can range from $4 to $8 per square foot.
Modular Sports Tiles
Modular interlocking tiles offer a modern, DIY-friendly solution. These are typically made from recycled plastic or durable polymers.
- Pros:
- Easy Installation: Designed for DIY setup, no special tools or expertise needed.
- Drainage: Many tiles have perforated surfaces that allow water to drain through, preventing puddles.
- Customizable: Available in various colors for court lines.
- Comfort: Offers more cushioning than concrete or asphalt.
- Cons:
- Cost: Can be more expensive per square foot than basic concrete or asphalt.
- Durability: May be less durable than solid concrete or asphalt over the very long term.
- Bounce Consistency: The interlocking nature might lead to slight inconsistencies in ball bounce compared to a seamless surface.
Playing Surface Considerations and Cost Savings
To save money on your outdoor basketball court materials:
- DIY Installation: If you’re comfortable with DIY projects, installing modular tiles can save significant labor costs. For concrete or asphalt, you might consider renting equipment and doing the prep work yourself if you have experience.
- Smaller Court Size: Opting for a half-court or even a quarter-court significantly reduces the material needed.
- Shop Around for Materials: Get quotes from multiple suppliers for concrete, asphalt, or tiles.
- Look for Sales: Keep an eye out for seasonal sales or discounts on building materials.
Building the Base for Your Backyard Court
A solid base is critical for the longevity and playability of your basketball court. This is often the most labor-intensive part of backyard basketball court construction.
Site Preparation and Grading
- Clear the Area: Remove all grass, plants, rocks, and debris from the chosen site.
- Excavation: Dig down to the required depth. This usually involves excavating about 6-8 inches for the base material.
- Grading: Ensure the area is perfectly level or has a slight slope (about 1% or 1/8 inch per foot) for drainage. A level surface is crucial for a consistent ball bounce.
- Compaction: Compact the soil thoroughly using a plate compactor. This prevents settling and ensures a stable foundation.
Installing the Base Layer
A well-compacted base layer is essential.
- Gravel Base: A layer of compacted gravel (typically 4 inches of crushed stone or aggregate) is laid over the prepared soil. This provides drainage and a stable base for the playing surface.
- Geotextile Fabric (Optional but Recommended): Laying a fabric layer over the soil before the gravel can prevent weeds from growing through and help keep the gravel from mixing with the soil.
Installing Your Hoop System
The basketball hoop is the centerpiece of your court. You have several options, each with different cost implications.
Portable Basketball Hoop Installation
Portable hoops are a popular choice for budget-conscious homeowners.
- Pros:
- Mobility: Can be moved if needed.
- Ease of Installation: Generally easier to set up than in-ground systems.
- Cost: Often less expensive upfront.
- Cons:
- Stability: Can be less stable in high winds or during aggressive play.
- Adjustability: Height adjustment mechanisms can sometimes be clunky.
- Base: Requires filling the base with water or sand, which can freeze or leak.
Tips for Portable Basketball Hoop Installation:
- Level Surface: Ensure the ground where the base will sit is perfectly level.
- Weighting: Use sand instead of water for the base for better weight and less risk of freezing/leaking.
- Anchor Kits: Consider anchor kits that can secure the portable unit to the ground for added stability.
In-Ground Basketball Hoop Installation
In-ground hoops are more permanent and offer superior stability.
- Pros:
- Stability: Very stable, ideal for serious play.
- Durability: Typically built with stronger materials.
- Aesthetics: Many players prefer the clean look of an in-ground system.
- Cons:
- Installation: Requires digging a substantial hole for the pole and concrete footing.
- Cost: Generally more expensive than portable hoops.
- Permanence: Cannot be easily moved.
Cost-Saving for Hoop Installation:
- DIY In-Ground Installation: If you’re comfortable with concrete work and digging, installing an in-ground hoop yourself can save on labor costs.
- Purchase During Sales: Look for sales events from sporting goods stores or online retailers.
- Mid-Range Models: Opt for a good quality mid-range in-ground hoop rather than the most expensive professional models.
Adding Finishing Touches and Features
Once the main court surface is laid and the hoop is up, you can consider these additions.
Backyard Court Lighting
If you envision playing after sunset, proper lighting is essential.
- LED Floodlights: Energy-efficient and provide excellent illumination. Mount them on poles around the perimeter.
- Solar-Powered Lights: A more eco-friendly and budget-friendly option, though they may not provide as much consistent light as wired systems.
- Placement: Strategize placement to avoid glare and ensure even lighting across the entire court.
Consider the cost of electrical work if you opt for wired lighting. Solar options are simpler for DIY installation and lower initial cost.
Resurfacing a Backyard Court
If you already have an existing, but worn-out, court surface (like old asphalt or concrete), resurfacing can be a much cheaper alternative to building from scratch.
- Cleaning: Thoroughly clean the existing surface.
- Crack Repair: Fill any cracks with appropriate patching material.
- Acrylic Coatings: Apply specialized acrylic coatings designed for sports courts. These can revitalize the surface, add color, and improve grip.
- Cost Savings: Resurfacing typically costs a fraction of the price of a new court installation.
DIY Basketball Court Setup: Lines and Markings
The classic white lines are important for defining the playing area.
- Masking Tape and Paint: For concrete or asphalt, use quality painter’s tape to mark your lines, then apply durable outdoor sports court paint.
- Modular Tiles: Many modular tile systems come with pre-marked lines or offer line kits for easy application.
- Professional Line Painting: If you opt for professional installation of concrete or asphalt, ask for line painting to be included, or budget separately for it.
Building a Basketball Court In Backyard: Budget Tips Summary
- Start Small: Consider a half-court or even a smaller shooting area to reduce material and labor costs.
- DIY What You Can: Site preparation, base installation, and even hoop installation can be DIY projects to save on labor.
- Compare Material Costs: Get quotes from multiple suppliers for concrete, asphalt, or tiles. Look for sales.
- Consider Asphalt: If initial cost is the primary concern, asphalt might be more budget-friendly than concrete.
- Modular Tiles for Easy DIY: For a hassle-free DIY installation, modular tiles are a great option, though they can be pricier upfront.
- Resurface Instead of Rebuild: If you have an existing court, resurfacing is a significant cost-saver.
- Used Materials: Explore options for used basketball hoops or backboards from online marketplaces, but inspect them carefully for damage.
- Phased Approach: You don’t have to do everything at once. Build the court surface first, then add lighting or advanced line markings later as your budget allows.
Residential Basketball Court Design Considerations
Your residential basketball court design can be tailored to your specific needs and aesthetic preferences.
Layout and Flow
- Placement: Position the court to maximize usable space and minimize disruption to your existing yard.
- Access: Ensure easy access to and from your home.
- Surroundings: Consider how the court integrates with your landscaping.
Safety Features
- Run-off Space: Allow at least 3-5 feet of clear space around the playing area.
- Fencing: If you have young children or live near a busy street, consider fencing around the court.
- Edge Finishing: Ensure the edges of your court are smoothly finished to prevent tripping hazards.
Maintenance for Longevity
Proper maintenance ensures your backyard basketball court remains in top condition.
- Cleaning: Sweep the court regularly to remove debris.
- Weed Control: Address any weeds that pop up around the edges or through cracks.
- Crack Repair: For concrete and asphalt, seal any new cracks promptly to prevent water damage.
- Seal Coating: Consider applying a sealant to concrete or asphalt every few years to protect it from the elements.
Frequently Asked Questions
Q1: What is the most cost-effective surface for a backyard basketball court?
A: Generally, asphalt tends to have a lower initial installation cost than concrete. However, if you’re looking for a very budget-friendly DIY option, installing modular sports tiles can also be cost-effective if you factor in the savings on professional labor.
Q2: Can I build a basketball court without professional help?
A: Yes, particularly if you choose modular sports tiles, which are designed for DIY installation. Site preparation and base installation for concrete or asphalt can also be done by experienced DIYers, but it’s more labor-intensive and requires specialized equipment.
Q3: What are the typical home basketball court dimensions?
A: While NBA courts are 94×50 feet, most residential courts are smaller. A common size for a half-court is around 47×50 feet, but you can customize dimensions to fit your backyard space.
Q4: How much does it cost to build a concrete basketball court?
A: The concrete basketball court cost typically ranges from $4 to $8 per square foot for installation, including materials and labor. This can vary greatly depending on your location and the complexity of the project.
Q5: Is it better to get a portable or in-ground basketball hoop?
A: For budget and flexibility, a portable basketball hoop installation is often preferred. For stability and a more permanent setup, an in-ground hoop is a better choice. Consider your budget and how seriously you’ll be playing.
Q6: Do I need permits to build a backyard basketball court?
A: You will likely need to check with your local building department. Many municipalities require permits for significant backyard construction projects like installing a sports court.
Q7: How do I handle backyard court lighting on a budget?
A: Consider solar-powered LED floodlights for a more affordable and easier-to-install lighting solution. Even a few well-placed lights can extend your playing time significantly without a huge cost.
Building your own backyard basketball court can be a rewarding project. By carefully planning, choosing your materials wisely, and implementing budget-saving strategies, you can create a fantastic recreational space that the whole family will enjoy for years to come.