
Can you add a basketball court to a deck? Yes, with the right planning and materials, you can absolutely create a fun DIY basketball court deck for hours of backyard enjoyment. Many homeowners wonder if their existing deck can support the demands of dribbling, shooting, and the occasional jump shot. The answer is a resounding yes, provided you approach the deck basketball court installation with a solid understanding of structural integrity and appropriate surfacing. This guide will walk you through the process of transforming your backyard deck basketball dreams into a reality, turning your deck basketball court ideas into a tangible home basketball court deck.
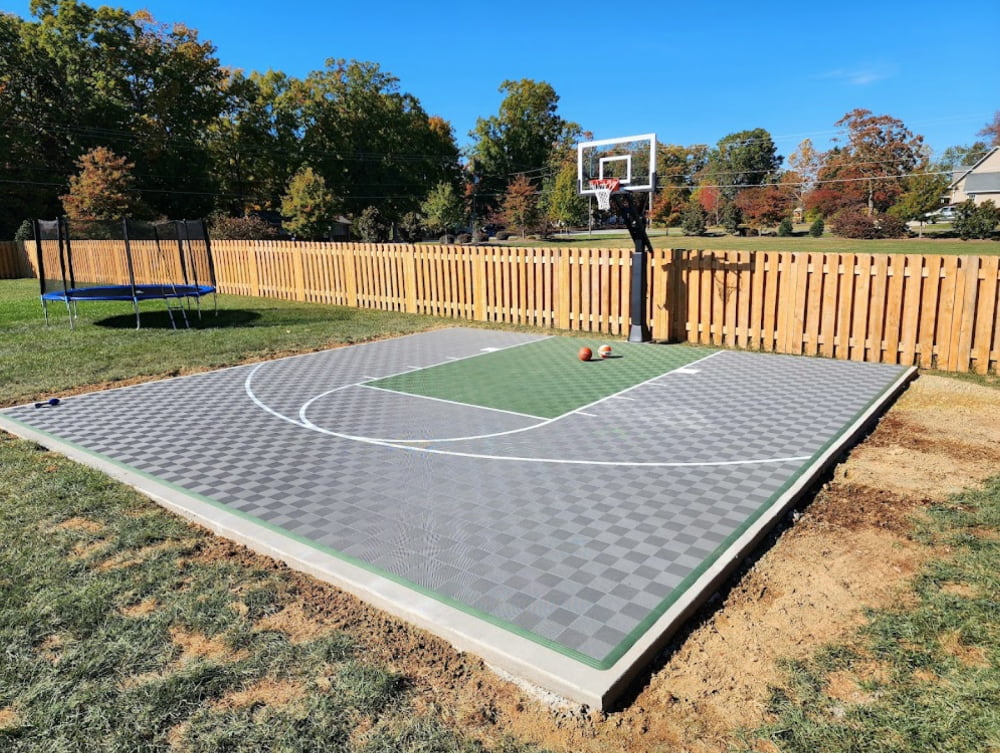
Image Source: modutile.com
Planning Your Deck Basketball Court
Before you grab a hammer or order any materials, thorough planning is crucial. This is the most important step to ensure your sport court for deck is safe, functional, and lasts for years to come.
Assessing Deck Strength
The first and most critical step in creating a basketball court on existing deck is evaluating its current structural integrity. Your deck needs to be strong enough to handle the dynamic loads of people playing basketball, including jumping and sudden movements.
Load-Bearing Capacity
- Joist Spacing and Size: Inspect the joists supporting your deck. Wider joists and closer spacing generally indicate greater strength. Typical deck joists are 2x6s or 2x8s, but for a basketball court, you might need or want to reinforce existing joists or add new ones.
- Beam and Post Support: Ensure the beams and posts supporting your deck are robust and properly anchored. They are the foundation of your deck’s strength.
- Weight of Materials: Consider the weight of the new surfacing material you plan to use. Some interlocking tile systems can be quite heavy.
- Professional Inspection: If you have any doubts about your deck’s strength, it’s highly recommended to consult a qualified structural engineer or a reputable deck builder. They can assess your deck’s load-bearing capacity and advise on any necessary reinforcements. This is not a step to skip for safety reasons.
Deck Size and Shape Considerations
The dimensions of your deck will dictate the size and layout of your DIY basketball court deck.
- Court Dimensions: Standard basketball courts are 94 feet long by 50 feet wide for professional play, and 84 feet by 50 feet for college play. For a backyard deck basketball court installation, you’ll need to scale this down significantly. A smaller, half-court or even a quarter-court setup is more realistic. Consider the space you have available on your deck, allowing for clearance around the perimeter for safety.
- Clearance: Ensure there’s adequate clearance around the playing area. Players should have enough space to move without bumping into railings, walls, or other obstacles. Aim for at least 3-5 feet of clear space around the playing surface if possible.
- Obstructions: Identify any permanent fixtures on or around the deck, such as stairs, seating areas, or roof overhangs, that might interfere with play. You may need to adjust your court layout to accommodate these.
Budgeting for Your Project
A realistic budget is essential for a successful deck basketball court installation. Costs can vary significantly based on the size of your court, the materials you choose, and whether you opt for professional help for certain tasks.
- Surfacing Materials: This is often the largest expense. Interlocking tiles designed for sports courts, rubber mats, or even specialized outdoor epoxy coatings all have different price points.
- Basketball Hoop System: Portable hoops are generally more affordable than in-ground or wall-mounted systems. Consider the weight and mounting requirements of the hoop.
- Reinforcement Materials: If your deck needs strengthening, factor in the cost of lumber, hardware, and potentially professional labor.
- Miscellaneous Supplies: Don’t forget items like screws, sealants, cleaning supplies, and potentially paint for court lines.
Choosing the Right Deck Surfacing for Basketball
The surface of your sport court for deck is paramount for both playability and the longevity of your deck. It needs to provide good traction, absorb some impact, and protect the underlying deck boards.
Popular Deck Surfacing Options
Several materials can be used to create a suitable surface for your backyard deck basketball.
Interlocking Sports Tiles
These are a very popular choice for deck basketball court installation and offer excellent performance.
- Pros:
- Excellent Traction: Designed for sports, providing superior grip.
- Shock Absorption: Reduces impact on joints and the deck.
- Durability: Made to withstand sports activity and weather.
- Drainage: Many have perforations to allow water to drain through.
- Easy Installation: Click-together system makes for a straightforward DIY process.
- Aesthetics: Available in various colors, allowing for custom court designs.
- Cons:
- Cost: Can be more expensive than other options.
- Weight: Some heavier tiles might require a stronger deck.
- Maintenance: Requires occasional cleaning to prevent debris buildup.
Rubber Mats/Rolls
Similar to tiles, rubber surfacing offers good cushioning and traction.
- Pros:
- Good Cushioning: Provides excellent shock absorption.
- Durable: Resists wear and tear from sports.
- Water Resistant: Generally holds up well to moisture.
- Cons:
- Less Breathable: Can trap moisture underneath if not installed carefully, potentially leading to deck rot.
- Aesthetics: May not offer the same visual appeal as tiles.
- Seams: Seams between rolls can be tripping hazards if not properly sealed.
Outdoor Sports Flooring Paint/Epoxy Coatings
These are painted or rolled onto the existing deck surface.
- Pros:
- Cost-Effective: Often the most budget-friendly option.
- Customizable: Can be painted with lines and logos.
- Seamless Surface: Creates a smooth, monolithic playing area.
- Cons:
- Less Cushioning: Offers minimal shock absorption.
- Traction: Can be slippery when wet unless specific non-slip additives are used.
- Durability: May wear down faster than tiles or rubber, requiring recoating.
- Deck Protection: Offers less protection to the underlying deck boards compared to tiles.
Factors to Consider When Choosing Surfacing
- Deck Type: Is your deck made of wood, composite, or something else? Some surfaces may be better suited for certain deck materials.
- Climate: If you live in a region with heavy rainfall, drainage will be a key factor.
- Budget: As mentioned, cost is a major consideration.
- Aesthetics: Do you want a professional-looking court or a more rustic feel?
- Maintenance: How much time are you willing to spend on upkeep?
Installing Your Deck Basketball Court
Once you’ve chosen your materials and confirmed your deck’s strength, it’s time for the deck basketball court installation. This is where careful execution will pay off.
Preparing the Deck Surface
Proper preparation is key to a long-lasting and safe basketball court on existing deck.
- Clean Thoroughly: Remove all furniture, debris, and dirt from the deck. Wash the deck with a good quality deck cleaner and a stiff brush. Rinse thoroughly and allow it to dry completely.
- Inspect and Repair: Look for any loose deck boards, nails, or screws. Hammer down or replace protruding fasteners. Repair or replace any rotten or damaged deck boards.
- Smoothness: Ensure the surface is as smooth as possible. Sand down any rough spots or splinters.
- Leveling (If Necessary): If your deck has significant dips or slopes, you might consider adding a layer of plywood or a leveling compound before installing your surfacing, especially if using tiles. However, this adds weight and complexity. For most interlocking tiles, a relatively flat deck is sufficient.
Laying the Surfacing Material
The installation process will vary depending on the material you choose.
Installing Interlocking Sports Tiles
This is typically a straightforward DIY process.
- Start in a Corner: Begin laying tiles from a corner of the deck, usually the one furthest from your entry point.
- Connect the Tiles: Most tiles have a male-and-female interlocking edge. Simply press the edges together until they snap or lock securely. You might need a rubber mallet to gently tap them into place to ensure a tight fit.
- Cutting for Fit: You will likely need to cut tiles to fit around the perimeter of your deck or any obstructions. Use a sharp utility knife or a jigsaw for clean cuts. Measure carefully before cutting.
- Edge Finishing: Many tile systems come with border pieces to create a clean, finished edge. Install these as you go or at the end.
Installing Rubber Mats/Rolls
- Roll Out: Carefully unroll the rubber mats or rolls onto the prepared deck.
- Trim to Fit: Use a sharp utility knife or mat cutter to trim the material to fit the dimensions of your deck and around any obstacles.
- Sealing Seams (Optional but Recommended): For a more cohesive surface and to prevent water seepage, you can use a specialized seam sealer or strong outdoor adhesive designed for rubber.
- Securing: Depending on the thickness and weight, the mats might stay in place with friction. For added security, especially in windy areas or if the mats are lighter, consider using a heavy-duty outdoor adhesive or mechanical fasteners around the perimeter.
Applying Sports Flooring Paint/Epoxy
- Follow Manufacturer Instructions: This method requires strict adherence to the manufacturer’s guidelines.
- Primer (If Required): Some systems require a primer for better adhesion.
- Application: Use rollers or squeegees to apply the paint or epoxy evenly. Work in sections.
- Adding Non-Slip Additives: Most sports paints include or allow for the addition of sand or specialized grit to improve traction. Mix this in according to the product’s instructions.
- Painting Lines: Once the base coat is dry, use painter’s tape to create clean lines for your court (free-throw line, three-point arc, etc.) and apply a contrasting color.
Adding a Basketball Hoop System
The right hoop system can elevate your backyard deck basketball experience.
Types of Basketball Hoops for Decks
- Portable Hoops: These have a weighted base that can be filled with water or sand. They are the easiest to set up and move but can be less stable on a deck due to their weight and potential for movement during play. Ensure the base is heavy enough and consider placing it on the strongest part of the deck.
- Wall-Mounted Hoops: These attach directly to a sturdy wall adjacent to or near your deck. This offers good stability and can save deck space. Ensure the wall is structurally sound and capable of handling the forces.
- Deck-Mounted Systems: Some systems are designed specifically to attach to deck railings or posts. These often require specialized hardware and careful consideration of the deck’s structure.
Mounting Considerations for Deck Basketball Systems
- Weight Distribution: Distribute the weight of the hoop and its base as evenly as possible. Avoid placing a heavy portable hoop near the edge of the deck.
- Deck Reinforcement: If you’re mounting a heavy-duty hoop directly to your deck structure (e.g., through the surface and to joists), you may need to add extra bracing or reinforcement to the deck framing to support the dynamic forces.
- Clearance: Ensure there’s enough overhead clearance for shooting and that the hoop’s backboard doesn’t obstruct movement on the deck.
- Safety: Always follow the manufacturer’s installation instructions precisely. If you’re unsure about mounting, consult a professional.
Maintenance for Your Deck Basketball Court
Proper maintenance will ensure your sport court for deck remains in good condition and safe for play.
Regular Cleaning
- Sweep and Wash: Regularly sweep your court surface to remove leaves, dirt, and debris. Periodically wash the surface with mild soap and water, especially if you notice any build-up or stains.
- Inspect Drainage: If using interlocking tiles with drainage holes, ensure these are clear of debris to prevent water pooling.
Seasonal Care
- Winterization: In colder climates, consider covering your court or removing portable hoops to protect them from snow and ice. Some interlocking tiles can become brittle in freezing temperatures.
- Check for Damage: Periodically inspect the surfacing for any cracks, lifting edges, or loose tiles. Address any issues promptly to prevent further damage or tripping hazards.
Hoop Maintenance
- Check Fasteners: Regularly check that all bolts and fasteners on your basketball hoop system are tight.
- Backboard and Rim: Clean the backboard and rim as needed. Ensure the rim is securely attached.
Safety First for Your Deck Basketball Court
Safety should be the top priority throughout the planning and installation process.
- No Slippery Surfaces: Ensure your chosen deck surfacing for basketball provides adequate traction, even when slightly damp.
- Clearance: Maintain clear space around the court perimeter and overhead.
- Secure Hoop: Make sure the basketball hoop is securely mounted and won’t tip over.
- Deck Integrity: Never compromise on the structural integrity of your deck. If in doubt, reinforce or consult a professional.
- Proper Footwear: Advise players to wear appropriate athletic shoes with good grip.
Deck Basketball Court Ideas for Inspiration
Looking for deck basketball court ideas to make your project unique?
- Team Colors: Use different colored tiles to create patterns or logos representing your favorite sports team.
- Half-Court Lines: Clearly mark your half-court line.
- Three-Point Arc: Install a painted or tiled three-point line for a more authentic feel.
- Custom Graphics: Some surfacing materials allow for custom printed graphics.
- Lighting: Add some outdoor lighting for evening play.
Frequently Asked Questions (FAQ)
Q1: Will a basketball court damage my existing deck?
A1: If your deck is structurally sound and you use appropriate surfacing and a secure hoop system, a basketball court should not damage your deck. However, overloading the deck or using unsuitable materials can cause damage. Always assess your deck’s strength and choose materials that protect the underlying structure.
Q2: What is the best surfacing for a deck basketball court?
A2: Interlocking sports tiles are generally considered the best surfacing for a deck basketball court. They offer excellent traction, shock absorption, durability, and allow for drainage, all while protecting the deck boards.
Q3: How much weight can a deck typically support for basketball play?
A3: The weight a deck can support varies greatly depending on its construction. A typical residential deck designed to code can usually support 40 pounds per square foot (psf) for live loads. However, the dynamic forces of basketball (jumping, running) can significantly increase this demand. It’s crucial to have your deck assessed by a professional if you have any concerns about its load-bearing capacity.
Q4: Can I install a basketball hoop directly onto my deck boards?
A4: It’s generally not recommended to attach a basketball hoop directly to deck boards alone, as they may not be strong enough. Hoops should be anchored to the deck’s structural framing (joists, beams, or posts) or mounted to a wall. Proper reinforcement may be needed.
Q5: How do I ensure my deck basketball court drains properly?
A5: Choose surfacing materials that are designed for outdoor use and allow for water drainage, such as interlocking tiles with perforations. If using a continuous surface like an epoxy coating, ensure it has a slight slope to allow water to run off the deck. Keep drainage holes clear of debris.
Q6: What are the basic dimensions for a small deck basketball court?
A6: For a backyard deck basketball court installation, you can customize the size to fit your deck. A common setup might be a half-court with dimensions around 20-30 feet long and 15-20 feet wide, including clearance. This allows for basic dribbling and shooting.
By following these detailed steps and tips, you can successfully add a fun and functional sport court for deck to your home, creating an exciting new space for recreation and activity. Remember to prioritize safety and structural integrity throughout your DIY basketball court deck project.