
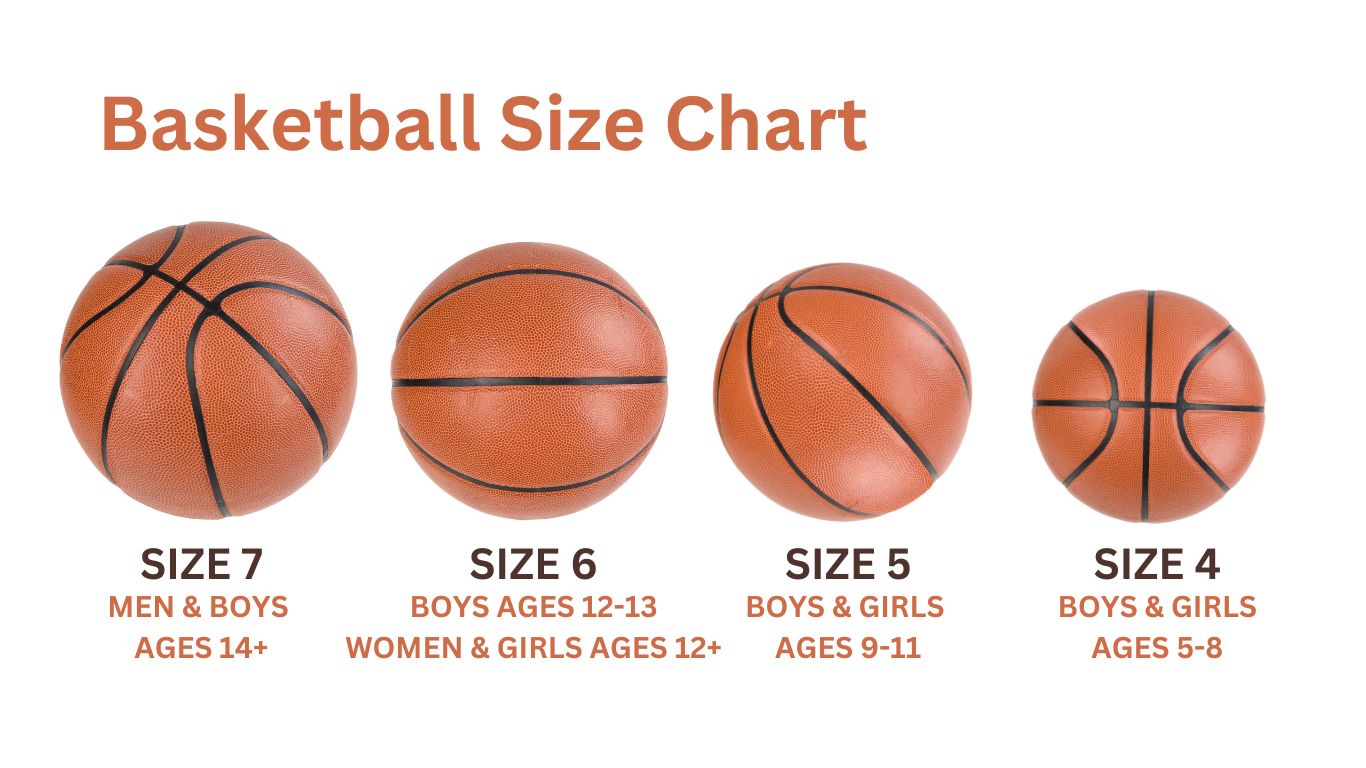
Image Source: proformancehoops.com
How Many Psi In A Basketball? Perfect Bounce
The perfect basketball bounce relies on the correct air pressure. A basketball should be inflated to between 7 and 9 psi (pounds per square inch).
Getting the proper basketball psi is crucial for a great game. It affects how the ball bounces, how it feels in your hands, and even how it travels through the air. Too much air, and the ball becomes rock hard, leading to unpredictable bounces and potentially painful impacts. Too little air, and the ball feels squishy and unresponsive, making dribbling difficult and shooting inaccurate. This post will guide you through everything you need to know about basketball inflation pressure to ensure your ball provides the perfect bounce every time.
The Science of the Bounce: Why Pressure Matters
A basketball is designed to compress and rebound when it hits a surface. This elasticity is directly tied to the air pressure inside. When a basketball is inflated to the recommended basketball pressure, the air inside acts like a spring. Upon impact, the ball deforms, storing energy from the impact. As the ball returns to its original shape, it releases this stored energy, propelling it back into the air.
The amount of air pressure determines how efficiently this energy is stored and released. A ball with the correct basketball air pressure gauge reading will have a consistent and predictable bounce. This consistency is vital for players at all levels, from casual pickup games to professional matches.
What is the NBA Basketball Psi Standard?
The National Basketball Association (NBA) has specific guidelines for NBA basketball psi. According to NBA rules, a basketball must be inflated so that it drops from a height of 6 feet onto the court and bounces up to a height of between 47 and 49 inches. This range is achieved with a basketball inflation pressure that typically falls within the 7-9 psi range.
This specific bounce height ensures that the game is played with a ball that offers optimal control and responsiveness. Players rely on this consistency to execute dribbles, passes, and shots with accuracy.
Finding Your Ball’s Sweet Spot: Recommended Basketball Pressure
While the NBA has its standards, the recommended basketball pressure for your specific ball might have slight variations depending on the manufacturer and the type of ball. However, the general guideline of 7-9 psi remains the most common and effective range.
- Leather Basketballs: These are often used in professional and high-level play. They typically require inflation within the 7-9 psi range for optimal feel and performance.
- Composite Leather Basketballs: A popular choice for both indoor and outdoor play, these also perform best within the 7-9 psi range.
- Rubber Basketballs: Often used for outdoor courts, these can be slightly more forgiving with pressure, but staying within or slightly below the 7-9 psi range is still advisable for good bounce.
Always check the ball itself for any manufacturer’s recommendations. Many basketballs have the recommended psi printed directly on them, often near the inflation valve.
Checking Your Basketball’s Psi: Essential Tools and Techniques
Knowing how to check basketball psi is a fundamental skill for any basketball player. The most accurate way to do this is by using a basketball air pressure gauge.
Using a Basketball Air Pressure Gauge
A basketball air pressure gauge is a simple yet invaluable tool. Most gauges are designed to fit standard basketball inflation valves. Here’s a step-by-step guide:
- Prepare the Gauge: Ensure the gauge is clean and that the needle is properly inserted or the digital display is ready.
- Locate the Valve: Find the small, circular valve on your basketball. You might need to gently push aside any excess rubber.
- Insert the Needle: Firmly and quickly insert the gauge’s needle into the valve. Avoid wiggling it, as this can damage the valve or the needle.
- Read the Pressure:
- Analog Gauges: The needle will move to indicate the pressure.
- Digital Gauges: The pressure will be displayed numerically.
- Interpret the Reading: The gauge will show the pressure in psi. If it’s too low or too high, you’ll need to adjust the inflation.
The Bounce Test: A Quick and Dirty Method
While a gauge is the most accurate, you can also perform a quick bounce test if you don’t have one readily available. This is less precise but can give you a good general idea:
- Find a Hard Surface: A basketball court, concrete driveway, or even a hard floor will work.
- Hold the Ball at Waist Height: Stand up straight and hold the ball at about waist level.
- Drop the Ball: Let the ball drop straight down, without any added force.
- Observe the Rebound:
- Too High/Bounces Too Far: The ball is likely overinflated basketball.
- Too Low/Doesn’t Bounce Much: The ball is likely underinflated.
- Ideal Bounce: The ball should bounce up to roughly shoulder height. This indicates it’s within the proper basketball inflation pressure range.
Remember, this bounce test is subjective and influenced by the surface you’re dropping it on. A gauge is always preferred for accuracy.
The Art of Inflation: Using a Basketball Pump
Once you know your ball needs air, you’ll need a basketball pump pressure tool. This usually involves a hand pump or an electric pump with a needle adapter.
Step-by-Step Inflation Process
- Attach the Needle: Screw the inflation needle securely onto your pump.
- Moisten the Needle: Lightly moisten the tip of the inflation needle with water or saliva. This helps it slide into the valve easily and prevents damage.
- Insert and Pump: Gently insert the needle into the basketball valve. Begin pumping air into the ball.
- Check Pressure Frequently: Periodically remove the needle and check the pressure using your basketball air pressure gauge. Overinflating is easy to do and can damage the ball.
- Stop at the Target Pressure: Inflate until the gauge shows your desired psi within the 7-9 psi range.
- Remove the Needle: Once the correct pressure is reached, carefully remove the needle.
- Test the Bounce: Give the ball a test bounce to confirm it feels and sounds right.
Dealing with an Overinflated Basketball
An overinflated basketball is just as problematic as an underinflated one. Overinflation makes the ball too hard, reducing its ability to absorb impact. This can lead to:
- Unpredictable Bounces: The ball will rebound much higher and more erratically than desired.
- Reduced Grip: A rock-hard ball can feel slippery and difficult to control.
- Increased Risk of Injury: A very hard ball can cause more pain on impact with hands or bodies.
- Ball Damage: Prolonged overinflation can stress the bladder and seams of the ball, potentially leading to premature wear or even rupture.
Deflating an Overinflated Ball
If you discover your ball is overinflated basketball, you’ll need to let some air out. The easiest way to do this is by using the deflation pin that often comes with tire pressure gauges or pump kits.
- Insert the Deflation Pin: Gently insert the deflation pin (similar to the inflation needle but designed to release air) into the valve.
- Release Air Gradually: Allow air to escape in short bursts, checking the pressure with your gauge or by feel after each release.
- Aim for the Target: Continue until the ball reaches the optimal 7-9 psi range.
Factors Influencing Basketball Pressure
Several factors can affect the ideal basketball inflation pressure and how it’s maintained:
Temperature Changes
Temperature has a significant impact on air pressure. As the temperature increases, the air inside the ball expands, and the pressure rises. Conversely, as the temperature drops, the air contracts, and the pressure decreases.
- Outdoor Play in Heat: If you play on a hot day, your ball might feel firmer than usual, and its bounce might be higher. It’s a good idea to slightly deflate it if it feels excessively hard.
- Indoor Play in Cold: If you store your basketball in a cold environment and then bring it to a warmer court, it will feel softer and bounce lower until it acclimates to the warmer temperature. It’s often best to check and adjust pressure in the environment where you’ll be playing.
Ball Material and Construction
The material and construction of a basketball can influence how it holds air and its responsiveness at different pressures.
- Butyl Bladder: Most basketballs use a butyl bladder, which is good at retaining air.
- Natural Rubber Bladder: Some higher-end balls might use natural rubber bladders, which can sometimes lose air slightly faster than butyl.
- Seam Construction: How the panels of the ball are stitched or molded together can also affect its overall feel and how it performs under pressure.
Age and Wear of the Ball
As a basketball ages and is used more, its materials can degrade slightly. This might affect its ability to hold air as effectively. The bladder might become less resilient, or the valve could develop a minor leak. Regular checks are essential for older balls.
Basketball Pressure Chart: A Quick Reference
Here’s a general basketball pressure chart to help you gauge your ball’s condition:
| PSI Range | Ball Feel & Bounce | Performance Impact | Action Needed |
|---|---|---|---|
| < 7 PSI | Soft, squishy, absorbs impact, low bounce. | Difficult to dribble, poor control, reduced shooting accuracy. | Inflate to 7-9 PSI. |
| 7-9 PSI | Firm but not hard, good grip, consistent bounce. | Optimal for dribbling, passing, and shooting. Responsive and predictable. | Maintain this pressure. |
| > 9 PSI | Rock hard, bounces very high and erratically. | Difficult to control, potential for hand/wrist injury, ball can feel slippery. | Deflate slightly until it reaches the 7-9 PSI range. |
Youth Basketball Psi Considerations
For younger players, the proper basketball psi is just as important, if not more so. Often, youth basketballs are made of softer materials and are lighter. While the 7-9 psi range is still a good guideline, it’s crucial to consider the child’s age and strength.
- Younger Children: Might benefit from a ball on the lower end of the spectrum (around 7 psi) to make it easier to grip and control. An overinflated basketball can be intimidating and painful for them.
- Older Children/Teens: Can comfortably handle the full 7-9 psi range.
It’s always best to observe the child playing. If the ball seems too hard for them to handle or they express discomfort, slightly reduce the pressure.
Maintaining Your Basketball for Longevity
Proper inflation is a key part of maintaining your basketball. Here are other tips to ensure your ball lasts longer and performs consistently:
- Store Properly: Keep your basketball out of direct sunlight and extreme temperatures when not in use. Storing it indoors is ideal.
- Avoid Rough Surfaces: While outdoor balls are built tough, prolonged use on abrasive surfaces like concrete can wear down the outer layer and affect the bounce over time.
- Clean Regularly: Wipe down your basketball with a damp cloth to remove dirt and grime. Avoid harsh chemicals, which can damage the material.
- Check the Valve: Ensure the inflation valve is clean and free of debris. If it feels stiff, a tiny drop of lubricant might help, but be cautious not to get it inside the ball.
FAQs About Basketball Psi
Q: What happens if I overinflate my basketball?
A: An overinflated basketball will be too hard, leading to unpredictable bounces, reduced grip, and potential damage to the ball’s bladder and seams. It can also increase the risk of hand injuries.
Q: How often should I check my basketball’s pressure?
A: It’s a good practice to check your basketball’s pressure before each significant play session, especially if it’s been stored for a while or if there have been recent temperature fluctuations.
Q: Can I use any pump to inflate a basketball?
A: You’ll need a pump designed for sports balls, typically one that comes with a needle adapter. Standard tire pumps might be too powerful or not have the correct attachment.
Q: My basketball seems to lose air quickly. What should I do?
A: This could indicate a slow leak in the valve or a small puncture. Ensure the valve is clean and the needle is removed correctly after inflation. If the problem persists, the ball’s bladder might be compromised, and you may need to consider replacing the ball.
Q: Is there a difference in recommended psi for different basketball brands?
A: While the 7-9 psi range is standard, some manufacturers might have slightly different recommendations printed on the ball itself. Always check the ball for any specific instructions.
By paying attention to basketball inflation pressure and using the right tools like a basketball air pressure gauge, you can ensure your basketball always delivers that perfect, satisfying bounce. Whether you’re practicing your crossover or playing a full-court game, the right amount of air makes all the difference.