
Image Source: www.glassgenius.com
Step-by-Step: How To Replace Basketball Backboard
Can you replace a basketball backboard yourself? Yes, with the right tools and a bit of patience, you can definitely replace a basketball backboard yourself. This guide will walk you through the entire process, from knowing when it’s time for a new one to securely mounting your new basketball backboard installation. We’ll cover everything you need to know about basketball backboard replacement cost, how to install a new basketball backboard, and the best basketball backboard replacement options for your needs.
Why Replace Your Basketball Backboard?
Over time, even the most durable basketball backboards can suffer damage. Understanding when it’s time for a basketball backboard replacement is key to maintaining a safe and enjoyable playing experience.
Common Reasons for Replacement:
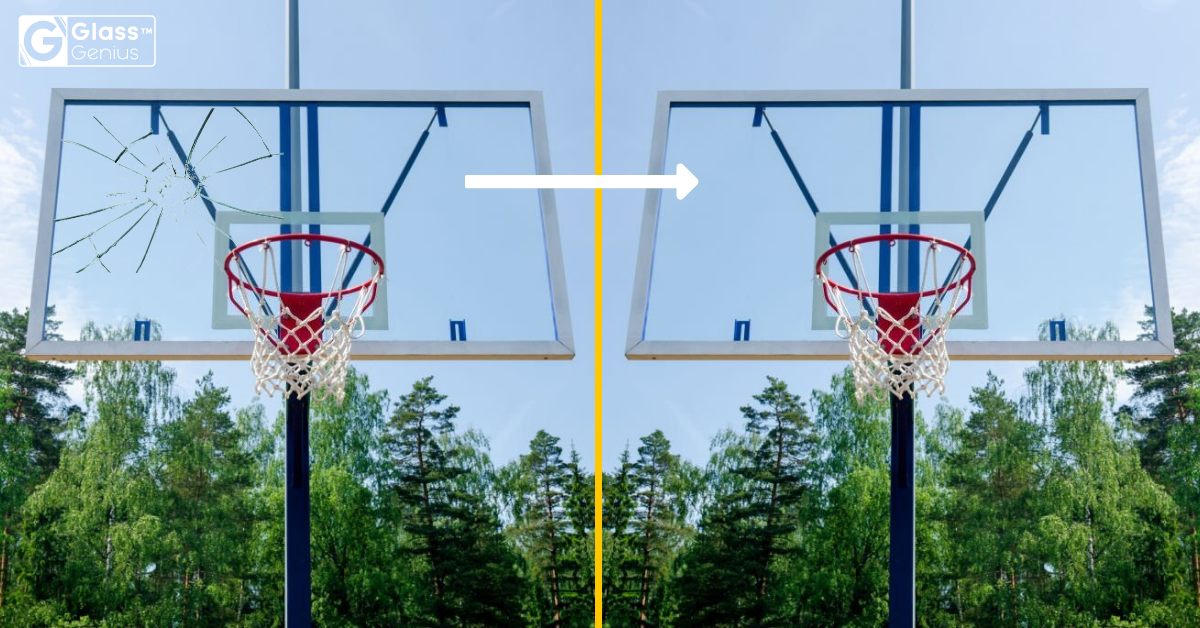
- Cracks and Fractures: The most obvious sign is visible damage. Cracks, especially those that compromise the structural integrity, mean it’s time for a new backboard.
- Warping: Exposure to the elements can cause the backboard to warp, leading to unpredictable ball bounces and a less than ideal playing surface.
- Rust and Corrosion: If your backboard is mounted on a metal pole or frame, rust can weaken the support structure, posing a safety hazard.
- Degraded Materials: Acrylic and polycarbonate backboards can become brittle and chalky with age and UV exposure, reducing their strength and clarity.
- Outdated or Damaged Rim: Sometimes, the rim itself is the problem, but if the rim is bolted directly to a damaged backboard, replacing both might be more efficient.
Choosing the Best Basketball Backboard Replacement
Selecting the right replacement backboard is crucial. There are several types, each with its own pros and cons regarding durability, performance, and cost. This will influence your basketball backboard installation.
Types of Basketball Backboards:
- Acrylic:
- Pros: Offers good rebound performance, can be cost-effective, and has a clear appearance.
- Cons: Can scratch and become brittle over time with prolonged sun exposure.
- Ideal for: Recreational play, driveways.
- Polycarbonate:
- Pros: Very durable, shatter-resistant, and offers excellent rebound. It’s a popular choice for both residential and some commercial applications.
- Cons: Can be more expensive than acrylic.
- Ideal for: Serious home players, schools, parks.
- Tempered Glass:
- Pros: Provides the best rebound and a professional feel, similar to indoor courts. Very durable and resistant to scratching.
- Cons: Most expensive option, heavier, and can break if hit with extreme force or if the mounting is compromised.
- Ideal for: Enthusiasts seeking professional-grade performance, in-ground hoops.
- Wood (Plywood):
- Pros: Inexpensive and easy to work with.
- Cons: Not durable against weather, warps easily, and offers poor rebound. Generally not recommended for long-term outdoor use.
- Ideal for: Temporary setups, very casual play.
When considering your basketball backboard replacement cost, factor in the material’s lifespan and performance. A higher initial investment in polycarbonate or glass might save you money in the long run due to its durability.
Preparing for the Backboard Replacement
Before you start the actual work of removing the old backboard and doing the basketball backboard installation, proper preparation is essential. This includes gathering the necessary tools and safety equipment.
Essential Tools and Materials:
- New Basketball Backboard: Ensure it matches the mounting pattern of your existing system or the pole you have.
- Replacement Rim (Optional but Recommended): It’s often best to replace the rim at the same time.
- Wrench Set or Socket Set: For loosening and tightening bolts.
- Adjustable Wrench: Useful for various bolt sizes.
- Screwdrivers: Phillips and flathead.
- Ladder: A sturdy, stable ladder is crucial for safe access.
- Safety Glasses: To protect your eyes from debris.
- Work Gloves: To protect your hands.
- Measuring Tape: To confirm dimensions if unsure.
- Drill and Drill Bits (if new holes are needed): For some installations.
- Level: To ensure your new backboard is straight.
- Caulking Gun and Exterior Caulk: To seal around bolt holes and prevent water ingress.
- Penetrating Oil (like WD-40): To loosen stubborn or rusted bolts.
- Assistant: Having an extra pair of hands makes the job much safer and easier.
Step-by-Step: Removing the Old Basketball Backboard
This is the first major step in how to replace basketball backboard. Be methodical and prioritize safety.
Procedure for Basketball Hoop Backboard Removal:
- Safety First: Ensure your ladder is on a stable, level surface. Have your assistant stabilize the ladder if necessary. Never overreach; reposition the ladder as needed.
- Access the Rim and Bolts: Climb the ladder carefully. You’ll typically find bolts securing the rim to the backboard.
- Remove the Rim: Use your wrench or socket set to loosen and remove the bolts holding the rim in place. Your assistant can help hold the rim steady as you remove the last bolts. Set the rim aside safely.
- Locate Backboard Mounting Bolts: With the rim removed, you’ll see the bolts that attach the backboard to its support bracket or directly to the pole.
- Loosen Backboard Bolts: Apply penetrating oil to any bolts that appear rusted or stuck. Let it sit for a few minutes. Then, using your wrench or socket set, carefully loosen and remove these bolts.
- Support the Old Backboard: As you remove the final bolts, your assistant should be ready to help support the weight of the old backboard. Slowly and carefully lower it from its position.
Step-by-Step: Installing the New Basketball Backboard
Now, it’s time for the new basketball backboard installation. This is where you’ll learn how to attach basketball backboard securely.
Procedure for Mounting Basketball Backboard:
- Position the New Backboard: Carefully lift the new backboard into position. Align the mounting holes on the backboard with the corresponding holes on the support bracket or pole. Your assistant is crucial here for holding the backboard steady.
- Insert Mounting Bolts: Begin by hand-threading the bolts through the backboard and into the bracket. This helps prevent cross-threading.
- Tighten Bolts (Partial): Once all bolts are in place, snug them up loosely with your wrench. Do not fully tighten them yet.
- Check for Levelness: Use a level to ensure the backboard is perfectly straight and vertical. Adjust as needed.
- Install the Rim: Once the backboard is level, position the new rim onto the backboard, aligning its mounting holes. Insert the rim bolts and washers, hand-tightening them first.
- Secure Everything: Now, systematically tighten all the backboard mounting bolts. Then, tighten all the rim mounting bolts. Ensure all connections are snug and secure, but avoid overtightening, which can damage the backboard or strip the threads.
- Final Tightening: Go back over all bolts one last time to confirm they are all securely tightened.
- Seal Bolt Holes (Optional but Recommended): For outdoor installations, apply a bead of exterior caulk around the bolt heads and edges of the backboard where it meets the mounting bracket. This will help prevent water from seeping into the mounting holes and causing corrosion or damage over time.
Basketball Backboard Replacement Cost Considerations
The overall basketball backboard replacement cost can vary significantly based on the type of backboard you choose, whether you replace the rim, and if you opt for professional installation.
Factors Affecting Cost:
- Backboard Material: Glass and high-quality polycarbonate are more expensive than acrylic.
- Backboard Size: Larger backboards generally cost more.
- Rim: If you replace the rim, add that cost. Many rims come with built-in net hooks and are designed for specific backboard types.
- Hardware: While some backboards come with mounting hardware, others may require you to purchase it separately. Ensure you have the correct basketball backboard mounting hardware.
- Labor (if hiring): Professional installation can add $100 to $300 or more, depending on your location and the complexity of the installation.
Estimated Costs:
- Acrylic Backboard: $50 – $200
- Polycarbonate Backboard: $100 – $400
- Tempered Glass Backboard: $200 – $700+
- Replacement Rim: $40 – $150+
- Full Hoop System (Pole, Backboard, Rim): $200 – $1000+
Knowing these figures helps in budgeting for your basketball backboard replacement cost.
Frequently Asked Questions About Replacing a Basketball Backboard
Here are some common questions people have when undertaking this project.
Q1: What is the best basketball backboard replacement?
A1: The “best” depends on your budget and playing style. For durability and good rebound, polycarbonate is excellent for outdoor home use. For a true professional feel, tempered glass is superior but more expensive. Acrylic is a good budget-friendly option for casual play.
Q2: Can I install a basketball backboard on any pole?
A2: Not necessarily. Most residential hoops use a universal mounting pattern, but it’s essential to check that the bolt pattern on your new backboard matches the bracket on your pole. Some older or custom setups might require an adapter or a different type of backboard.
Q3: How tight should I make the bolts when mounting a basketball backboard?
A3: Bolts should be snug and secure, but avoid overtightening. Overtightening can strip threads, crack the backboard (especially acrylic or glass), or warp metal components. Use a wrench or socket set and tighten until you feel firm resistance. If using power tools, use a low torque setting.
Q4: Do I need to replace the rim when replacing the backboard?
A4: It’s highly recommended. The rim is subjected to significant stress during gameplay. If your old rim is worn or rusted, replacing it with the backboard ensures a fresh, sturdy setup and can prevent future issues. Plus, it’s easier to do both at once.
Q5: How do I know if my backboard needs replacement?
A5: Look for visible cracks, deep scratches, warping, discoloration, or if the ball doesn’t bounce predictably off it. Any damage that compromises structural integrity or playability warrants a replacement.
Q6: What are the basic steps for basketball backboard removal?
A6: First, remove the rim from the backboard. Then, locate and remove the bolts securing the backboard to the support bracket or pole. Have someone help you support the backboard as you take out the last bolts.
Q7: What are the key steps for basketball backboard installation?
A7: Align the new backboard with the mounting bracket, insert and loosely tighten the bolts. Level the backboard. Then, attach the rim and tighten all bolts securely. Sealing bolt holes can prolong its life.
Q8: Where can I find basketball backboard mounting hardware?
A8: Most new backboards come with the appropriate mounting hardware. If not, check the manufacturer’s website or a sporting goods store. Ensure the hardware is compatible with your backboard and mounting bracket, considering material and thread type.
Q9: What is a common basketball backboard repair?
A9: Minor cosmetic repairs might involve cleaning or polishing. However, significant cracks or structural damage usually mean a basketball backboard replacement is necessary rather than repair, especially for safety and performance. Repairing a shattered glass backboard is generally not feasible or safe.
By following these steps and considerations, you can confidently tackle the task of replacing your basketball backboard, ensuring your hoop is ready for action once again.