
What is the process for painting a basketball court? The process involves preparing the court surface, applying primer, and then using specialized paints to create the distinct lines and logos that define the playing area. Can I paint my own basketball court? Yes, with the right tools, materials, and careful preparation, it’s possible to paint your own basketball court, though professional services are often recommended for optimal results. Who is responsible for painting basketball courts? Typically, maintenance crews for sports facilities, specialized athletic court painting companies, or sometimes even DIY enthusiasts undertake this task.
The vibrant lines and logos that make a basketball court instantly recognizable are the result of a meticulous and skillful process. Whether it’s the polished sheen of an indoor hardwood floor or the durable finish of an outdoor asphalt surface, the sports court painting requires careful planning and execution. This in-depth guide will walk you through the entire journey, from the initial preparation to the final protective coatings, revealing how these essential basketball court markings come to life.
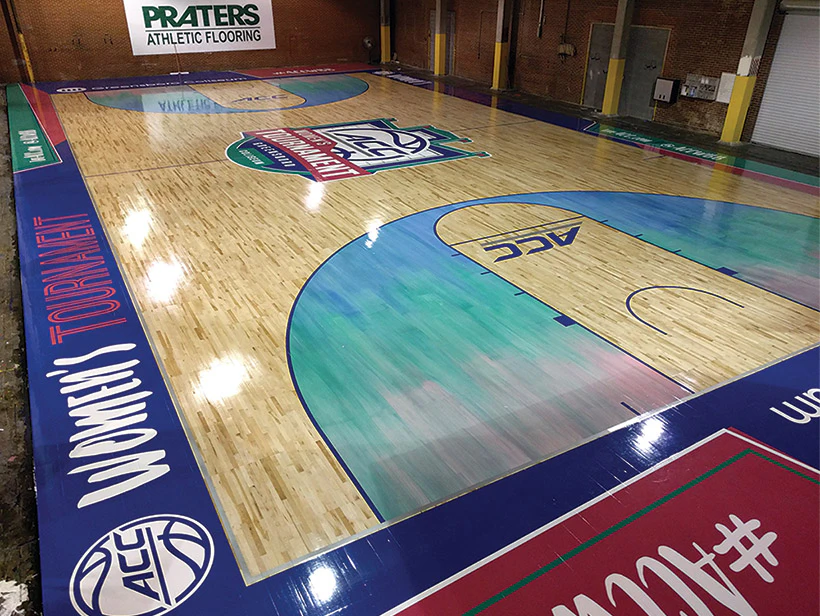
Image Source: img.woodfloorbusiness.com
Deciphering the Canvas: Preparing the Court Surface
Before a single drop of paint touches the court, the foundation must be impeccably prepared. This is arguably the most crucial step in ensuring the longevity and visual appeal of the finished product. The approach to preparation differs significantly between indoor and outdoor courts.
For Indoor Hardwood Courts: A Gentle Approach
Indoor basketball courts are typically made of hardwood, often maple. These surfaces are sensitive and require a delicate touch.
Cleaning and Dust Removal
The first step is a thorough cleaning. Any dust, dirt, oils, or residues can prevent the paint from adhering properly.
- Sweeping and Vacuuming: Heavy-duty brooms and industrial vacuum cleaners are used to remove loose debris.
- Wiping Down: A clean, damp mop with a mild, approved wood floor cleaner is then used to lift any remaining grime. It’s crucial to avoid over-wetting the wood.
- Degreasing: For any oily spots, a specialized wood floor degreaser might be applied sparingly and wiped away immediately.
Screening and Refinishing (When Necessary)
If the court has old paint, scuff marks, or a worn-out finish, a more extensive process is needed. This falls under basketball court resurfacing.
- Screening: This involves using a specialized buffer with a fine-grit screen. It lightly abrades the existing finish, creating a surface that the new paint and finish can bond to. Think of it as a very fine sanding.
- Dust Extraction: This process generates a lot of fine dust, which must be meticulously removed using vacuum attachments on the buffer and subsequent sweeping and vacuuming.
- Spot Repairs: Any minor damage, like dents or gouges, will be addressed at this stage before the main screening.
Masking and Protection
Protecting areas that should not be painted is vital.
- Blue Painter’s Tape: High-quality painter’s tape is used to carefully mask off baseboards, bleachers, entryways, and any other features adjacent to the court.
- Plastic Sheeting: Large plastic sheets might be used to cover larger areas to protect them from overspray, especially if airless sprayers are used for certain applications.
For Outdoor Courts: A Robust Preparation
Outdoor basketball courts, commonly made of asphalt or concrete, require a more aggressive approach to preparation. This is where outdoor basketball court painting presents its unique challenges.
Cleaning and Debris Removal
The goal here is to remove everything that could compromise the paint’s adhesion.
- Sweeping: Large rotary sweepers or manual brooms clear away leaves, dirt, and loose gravel.
- Pressure Washing: This is a critical step. High-pressure washers remove ingrained dirt, mildew, algae, oil stains, and old, peeling paint. The pressure needs to be sufficient to clean but not so high that it damages the court surfacing.
- Stain Treatment: Stubborn stains, like oil or rust, might require specialized cleaners or degreasers before pressure washing.
- Drying: The court must be completely dry before any primer or paint is applied. This can take 24-48 hours depending on weather conditions.
Repairing Cracks and Potholes
The durability of the paint is heavily dependent on the condition of the underlying surface. Basketball court resurfacing often includes these repairs.
- Crack Filling: Small cracks are typically filled with flexible acrylic or rubberized sealants designed for asphalt or concrete.
- Pothole Repair: Larger holes are patched with specialized asphalt patch material or concrete repair compounds. These repairs need to cure thoroughly before painting.
Surface Profiling (Etching)
For asphalt and concrete, creating a slight roughness, or “profile,” helps the paint grip the surface.
- Acid Etching (Concrete): For concrete, a mild acid solution (like a diluted muriatic acid) can be used to etch the surface, opening up the pores. This requires extreme caution, proper safety gear, and thorough rinsing.
- Mechanical Grinding/Shot Blasting (Concrete & Asphalt): More commonly, mechanical methods like diamond grinding or shot blasting are used. These physically abrade the surface, creating an ideal texture for paint adhesion and also removing any weak surface layers. This is a key aspect of preparing for athletic court painting.
Final Cleaning and Drying
After repairs and profiling, another thorough cleaning is essential to remove any dust or debris generated. Again, complete drying is paramount.
The Palette: Choosing the Right Basketball Court Paint Types
The choice of paint is crucial for both aesthetics and performance. Different environments and desired outcomes dictate the best basketball court paint types.
Acrylic Latex Paints: The Workhorse
For both indoor and outdoor courts, high-quality acrylic latex paints are the most common choice.
- Durability: They offer good resistance to abrasion, UV rays (for outdoor courts), and weathering.
- Flexibility: They can expand and contract with temperature changes without cracking, especially important for outdoor surfaces.
- Adhesion: They bond well to properly prepared asphalt, concrete, and sealed wood surfaces.
- Low VOCs: Many acrylic paints have low Volatile Organic Compounds (VOCs), making them safer to work with and better for the environment.
- Color Retention: They generally provide good color retention over time.
Urethane-Based Paints: Enhanced Performance
For high-traffic indoor courts or demanding outdoor conditions, urethane-modified acrylics or pure urethanes can be used.
- Superior Durability: Urethanes offer exceptional resistance to wear, chemicals, and abrasion.
- Gloss Retention: They tend to maintain their gloss longer.
- Cost: They are generally more expensive than standard acrylics.
Specialized Coatings: Specific Needs
- Waterborne Coatings: Increasingly popular for indoor courts due to low odor and quick drying times.
- Epoxy Coatings: Sometimes used as a primer or for specific high-traffic areas, offering extreme durability and chemical resistance. However, they can be less flexible than acrylics.
The Art of Application: Laying Down the Lines and Colors
With the surface prepared and the paint chosen, the actual painting process begins. This is where the skill of line striping basketball courts truly shines.
Priming: The Essential First Layer
Primer acts as a bonding agent between the court surface and the topcoat of paint.
- Purpose: It seals porous surfaces, improves adhesion, and provides a uniform base for the finish color.
- Type: The primer should be compatible with the court surface and the chosen topcoat. For outdoor courts, a primer specifically designed for asphalt or concrete is used. For indoor hardwood, a wood primer or sealer is applied.
- Application: Primers can be rolled or sprayed onto the court. It needs to dry completely according to the manufacturer’s instructions before the next coat.
Base Coat Application: Setting the Stage
The first solid color applied is typically the base coat, often covering the entire court.
- Color Choice: This might be a standard wood tone for indoor courts or a specific color for outdoor courts (e.g., green, blue, or even custom colors).
- Application Methods:
- Rolling: For smaller areas or touch-ups, rollers provide good coverage.
- Spraying: Airless sprayers are often used for larger courts, providing a smooth, even finish and faster application. This requires careful masking.
Masking the Lines: Precision is Key
This is where the detailed basketball court markings are defined.
- High-Quality Tape: Precision is paramount, so high-quality masking tape with sharp edges is essential. The tape must adhere firmly to prevent paint bleed.
- Stencils: For logos, numbers, and specific lines (like the three-point arc), stencils are created and carefully positioned. These are often made from heavy-duty vinyl or cardstock.
- Line Striping Machine: For straight lines, a line striping machine or a specialized striping tape applicator can ensure perfectly straight and consistent lines.
Painting the Lines and Logos: Bringing the Court to Life
This is the most intricate part of the process.
- Multiple Coats: Lines and logos usually require two thin coats rather than one thick coat to ensure opacity and durability.
- Paint Application:
- Brush: For very fine details or small areas, brushes are used.
- Roller: Small rollers on extension poles are effective for painting lines and logos within masked areas.
- Sprayer: If the lines are wide enough, a sprayer can be used with fine tips for a clean finish, but this requires meticulous masking.
The Three-Point Arc, Key, and Center Circle
These iconic shapes require careful layout and application.
- Measurements: Standard dimensions are critical. Rulers, measuring tapes, and chalk lines are used to mark the exact placement of these lines before masking.
- Stencils and Templates: Pre-made stencils or flexible templates are often used to accurately trace and paint the arcs and circles.
Applying the Topcoat/Sealer: Protection and Shine
Once all the painted lines and logos have dried sufficiently, a protective topcoat is applied.
- Purpose: This seals the paint, protects it from scuffing and abrasion, enhances its durability, and can provide a desired sheen (matte, satin, or gloss).
- Type: For indoor courts, a high-quality polyurethane or acrylic sealer is used. For outdoor courts, an acrylic sealer designed to withstand UV and weathering is crucial. This step is vital for basketball court maintenance.
- Application: The topcoat is typically applied via roller or sprayer, ensuring an even and consistent finish across the entire court.
Maintaining the Brilliance: Basketball Court Maintenance
Regular basketball court maintenance is essential to preserve the paint job and the overall condition of the court.
Regular Cleaning
- Indoor Courts: Daily sweeping or dust mopping is crucial. Periodic deep cleaning with approved wood floor cleaners is necessary.
- Outdoor Courts: Regular sweeping to remove debris. Pressure washing as needed, typically annually or biannually, depending on environmental factors.
Touch-Ups and Repairs
- Scuff Marks: Minor scuff marks can often be buffed out or cleaned with specialized cleaners.
- Chipped Paint: Small chips or worn areas can be touched up by carefully cleaning the area, lightly sanding it, and applying a thin coat of the original paint color.
- Surface Cracks: Outdoor courts will inevitably develop new cracks. These need to be addressed promptly with appropriate sealants to prevent water intrusion and further damage.
Re-coating and Resurfacing
Over time, even the best paint jobs will wear down.
- Re-coating: When the paint starts to fade or show significant wear but the underlying surface is still in good condition, a new topcoat can be applied after light cleaning and preparation.
- Full Resurfacing: If the court surfacing itself is damaged (e.g., significant cracking, delamination of wood), a complete basketball court resurfacing project may be required. This involves repairing the substrate, applying new coatings, and repainting all the basketball court markings.
Materials and Tools of the Trade
A professional job relies on specific equipment and high-quality materials.
| Tool/Material | Purpose | Notes |
|---|---|---|
| Pressure Washer | Cleaning outdoor courts, removing old paint | Essential for asphalt and concrete surfaces. |
| Sweepers/Brooms | Removing loose debris | Industrial grade for large areas. |
| Vacuum Cleaners | Removing fine dust and debris, especially on indoor courts | HEPA filters recommended for optimal dust capture. |
| Painter’s Tape | Masking off areas to be protected from paint | High-quality, clean-edge tape is vital. |
| Stencils | Creating logos, numbers, and precise shapes | Durable vinyl or cardstock. |
| Rollers (various naps) | Applying paint and sealers | Nap choice depends on the surface texture. |
| Brushes | Detail work, edges, and small areas | High-quality brushes hold paint well and apply smoothly. |
| Paint Sprayer (Airless) | Efficient application of base coats and topcoats on large surfaces | Requires skill and proper masking to prevent overspray. |
| Line Striping Machine | Applying straight, consistent lines | Can be manual or walk-behind. |
| Measuring Tapes/Rulers | Accurate layout of court lines and markings | Essential for adhering to official dimensions. |
| Chalk Lines | Marking layout lines before painting | Used to guide tape and paint. |
| Safety Equipment | Gloves, eye protection, respirators, knee pads | Crucial for protecting workers during cleaning, sanding, and painting. |
| Primer | Sealing the surface and improving paint adhesion | Must be compatible with the court surface and topcoat. |
| Acrylic Latex Paint | Primary paint for lines and colors | Durable, flexible, and weather-resistant (for outdoor). |
| Urethane Sealers | Protective topcoat for durability and gloss | Enhances lifespan and protects against wear. |
| Crack Fillers/Sealants | Repairing cracks in asphalt and concrete surfaces | Flexible, weather-resistant materials are best. |
Frequently Asked Questions (FAQ)
How long does it take to paint a basketball court?
The time can vary significantly depending on the size of the court, the condition of the existing surface, the complexity of the design, and the number of people working on it. A basic outdoor basketball court painting job on a well-prepared surface might take 1-3 days for a small team. However, a full basketball court resurfacing project with extensive repairs and intricate logos can take a week or more.
What is the average cost of painting a basketball court?
The cost can range from a few hundred dollars for a simple DIY job on a small outdoor court to several thousand dollars for a professionally painted indoor hardwood court with custom logos. Factors influencing cost include:
- Surface Type: Indoor hardwood courts are typically more expensive to paint than outdoor asphalt or concrete courts.
- Condition of the Surface: Extensive repairs or resurfacing will increase costs.
- Complexity of Design: Custom logos, intricate patterns, and multiple colors add to the labor and material costs.
- Paint Quality: High-performance paints and sealers are more expensive.
- Labor Costs: Professional services charge for their expertise and time.
What is the best time of year for outdoor basketball court painting?
The best time for outdoor basketball court painting is during dry, warm weather. Temperatures between 50°F and 90°F (10°C and 32°C) are ideal. Humidity should be low, and there should be no rain forecast for at least 48-72 hours after painting to allow the paint and sealers to cure properly. Avoid painting in direct, harsh sunlight, which can cause the paint to dry too quickly, leading to uneven application and poor adhesion.
How many coats of paint are typically applied?
Generally, two thin coats of paint are recommended for both the base color and the lines/logos. This ensures good coverage, opacity, and durability. A primer coat is also usually applied first, followed by one or two coats of the topcoat sealer.
Can I use regular house paint on a basketball court?
No, it is strongly advised against using regular house paint. Basketball courts are high-traffic surfaces that require specialized sports court painting products. House paints are not formulated to withstand the heavy wear, abrasion, UV exposure (for outdoor courts), and frequent cleaning that a basketball court endures, leading to premature fading and peeling.
In conclusion, the process of painting a basketball court, whether indoors or outdoors, is a blend of meticulous preparation, careful material selection, and precise application. Each step, from the initial cleaning and repair of the court surfacing to the final protective sealer, plays a vital role in creating a durable, visually appealing, and functional playing surface. The expertise involved in athletic court painting ensures that these spaces can withstand the rigors of the game and continue to inspire athletes for years to come.